

Once you get halfway good at electronics repair, you start to value the words “for parts” while looking at listings. The definition of this is more elastic than it appears, and varies depending on the device and context. Many times the object is quite literally just junk or unsalvageable garbage. Sometimes the tweaks it needs are minor, like a bad solder joint that would take 20 minutes to fix. In other situations the issue is simply cosmetic and easily fixed with a combination of aftermarket parts from Aliexpress or some 3D printed bullshit that some hero in your exact situation once put online.
But the funniest scenario is when the device is functionally like new. This can happen for a lot of reasons, but a primary one is that we produce a lot of complex bullshit and most people would rather return something than try to repair it. This is understandable; products are often not made to last and we have not fostered the skill of caring for your goods as a culture since Radio Shack existed. Returned electronics that are not that broken often end up in the hands of bulk electronics sellers, electronics recycling warehouses, and on the secondary market. Though much of what you’ll find is often legitimately broken beyond repair, you can find gems. If you’re smart and a little lucky, you can clean up.
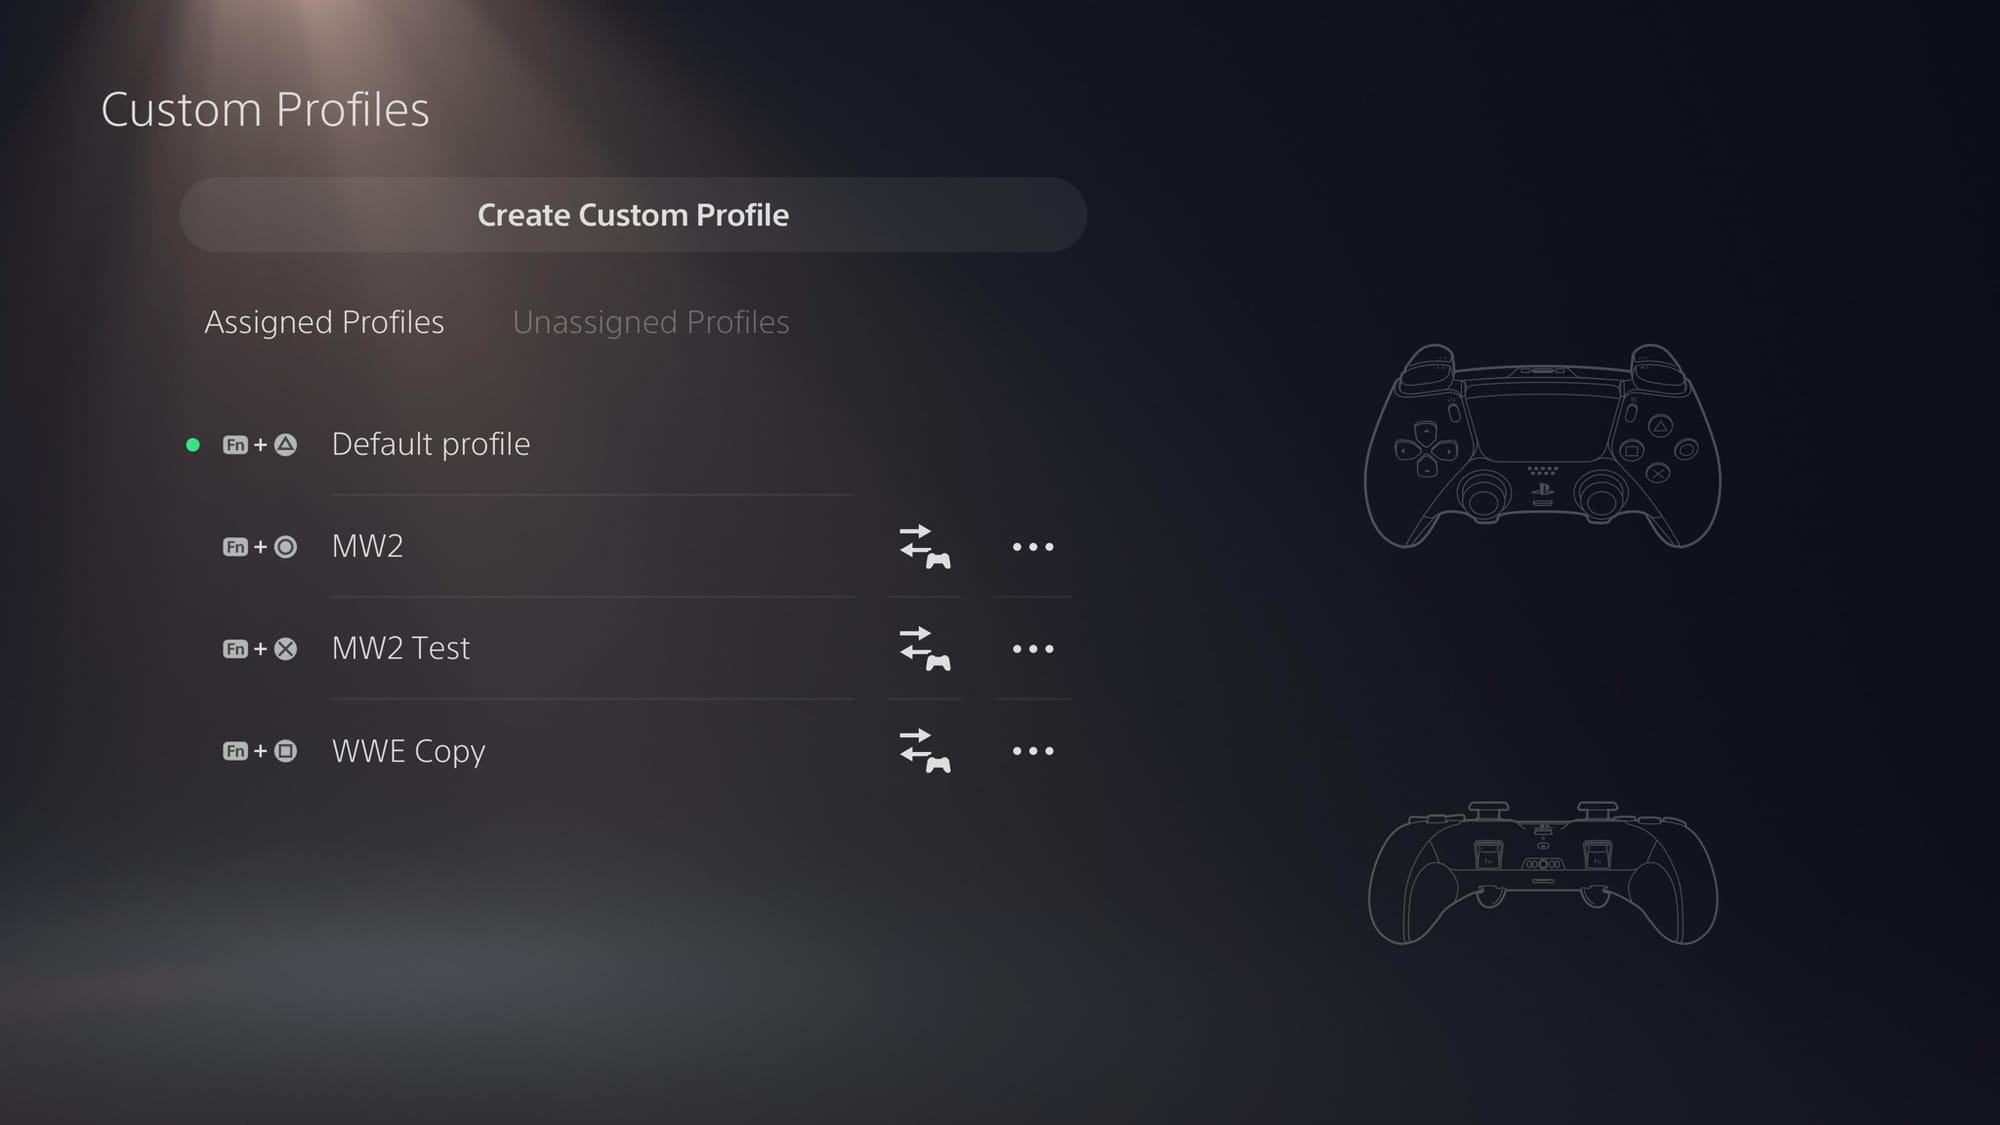
This is the exact situation I ended up in when I bought a DualSense Edge recently on eBay for 65 bucks with the intent of turning it into a project. After ripping off the rubber grip that the previous owner had swathed the controller in and thoroughly wiping it down with isopropyl alcohol, I turned it on, paired it with my PS5, and it worked perfectly fine. There was maybe a tiny bit of an audible click on the thumb sticks, and the amount of drift on the sticks according to software from Gamepadla was enough that it would only bother you if you professionally played Call of Duty. (Unsurprisingly, the profiles on the device were named “MW2 Test” or “WWE Copy”) But just because the controller was basically fine did not mean I wasn’t going to turn it inside out.
Shell swap
One of the most annoying yet rewarding mods you can do to a controller or handheld is a shell swap, where you replace the external plastic with a cool new color or texture. Sometimes this is done because the original device got dirty, yellowed with age, or suffered cosmetic damage, but most of the time it’s because you want to make your controller semi-transparent. Though the complexity of each mod varies from device to device, it’s rarely as simple as just removing the shell and putting a new one on. You usually have to completely disassemble the thing module by module, and every piece of hardware is slightly annoying in its own unique way. The part that sucks on a Steam Deck shell swap, for example, is removing the display, which is why mine remains stock minus the SSD.
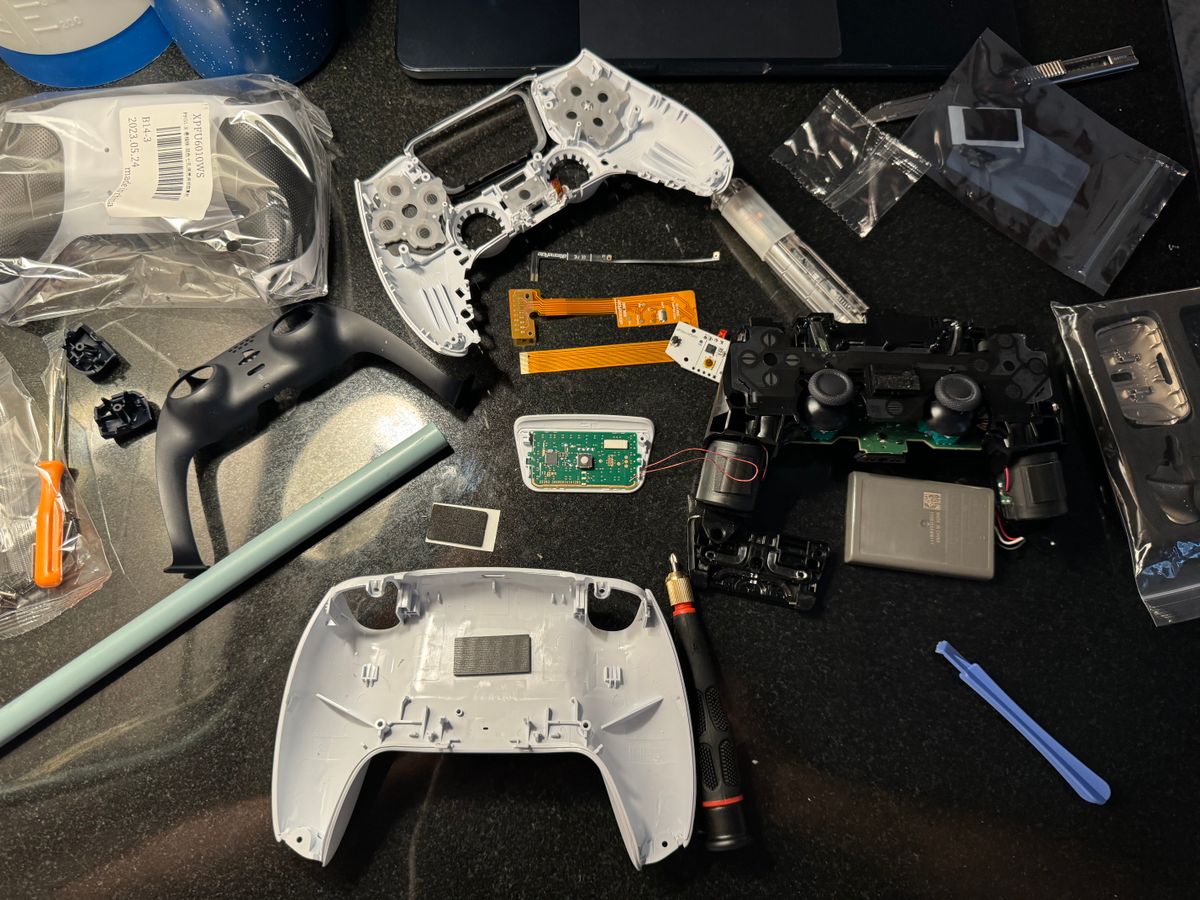
Normally, I would probably not do this to a controller that cost 200 dollars, but the math shifts slightly if you win the For Parts lottery like I did, or if you didn’t and need to go in there to repair it anyway. In terms of aftermarket controller shell swaps, ExtremeRate is a go-to brand and they’re the same people I went with when I added rear bumpers to my regular DualSense so many years ago. The kit that ExtremeRate sends you comes with a cheap prying tool for removing the shell (if you need a better prying tool my aforementioned friend recommends RELIFE on Aliexpress), a screwdriver, replacement screws in case you mess up, and several tiny replacement parts like springs. They also have a YouTube tutorial with a robotically machine translated voiceover, but it’s pretty thorough in its steps.
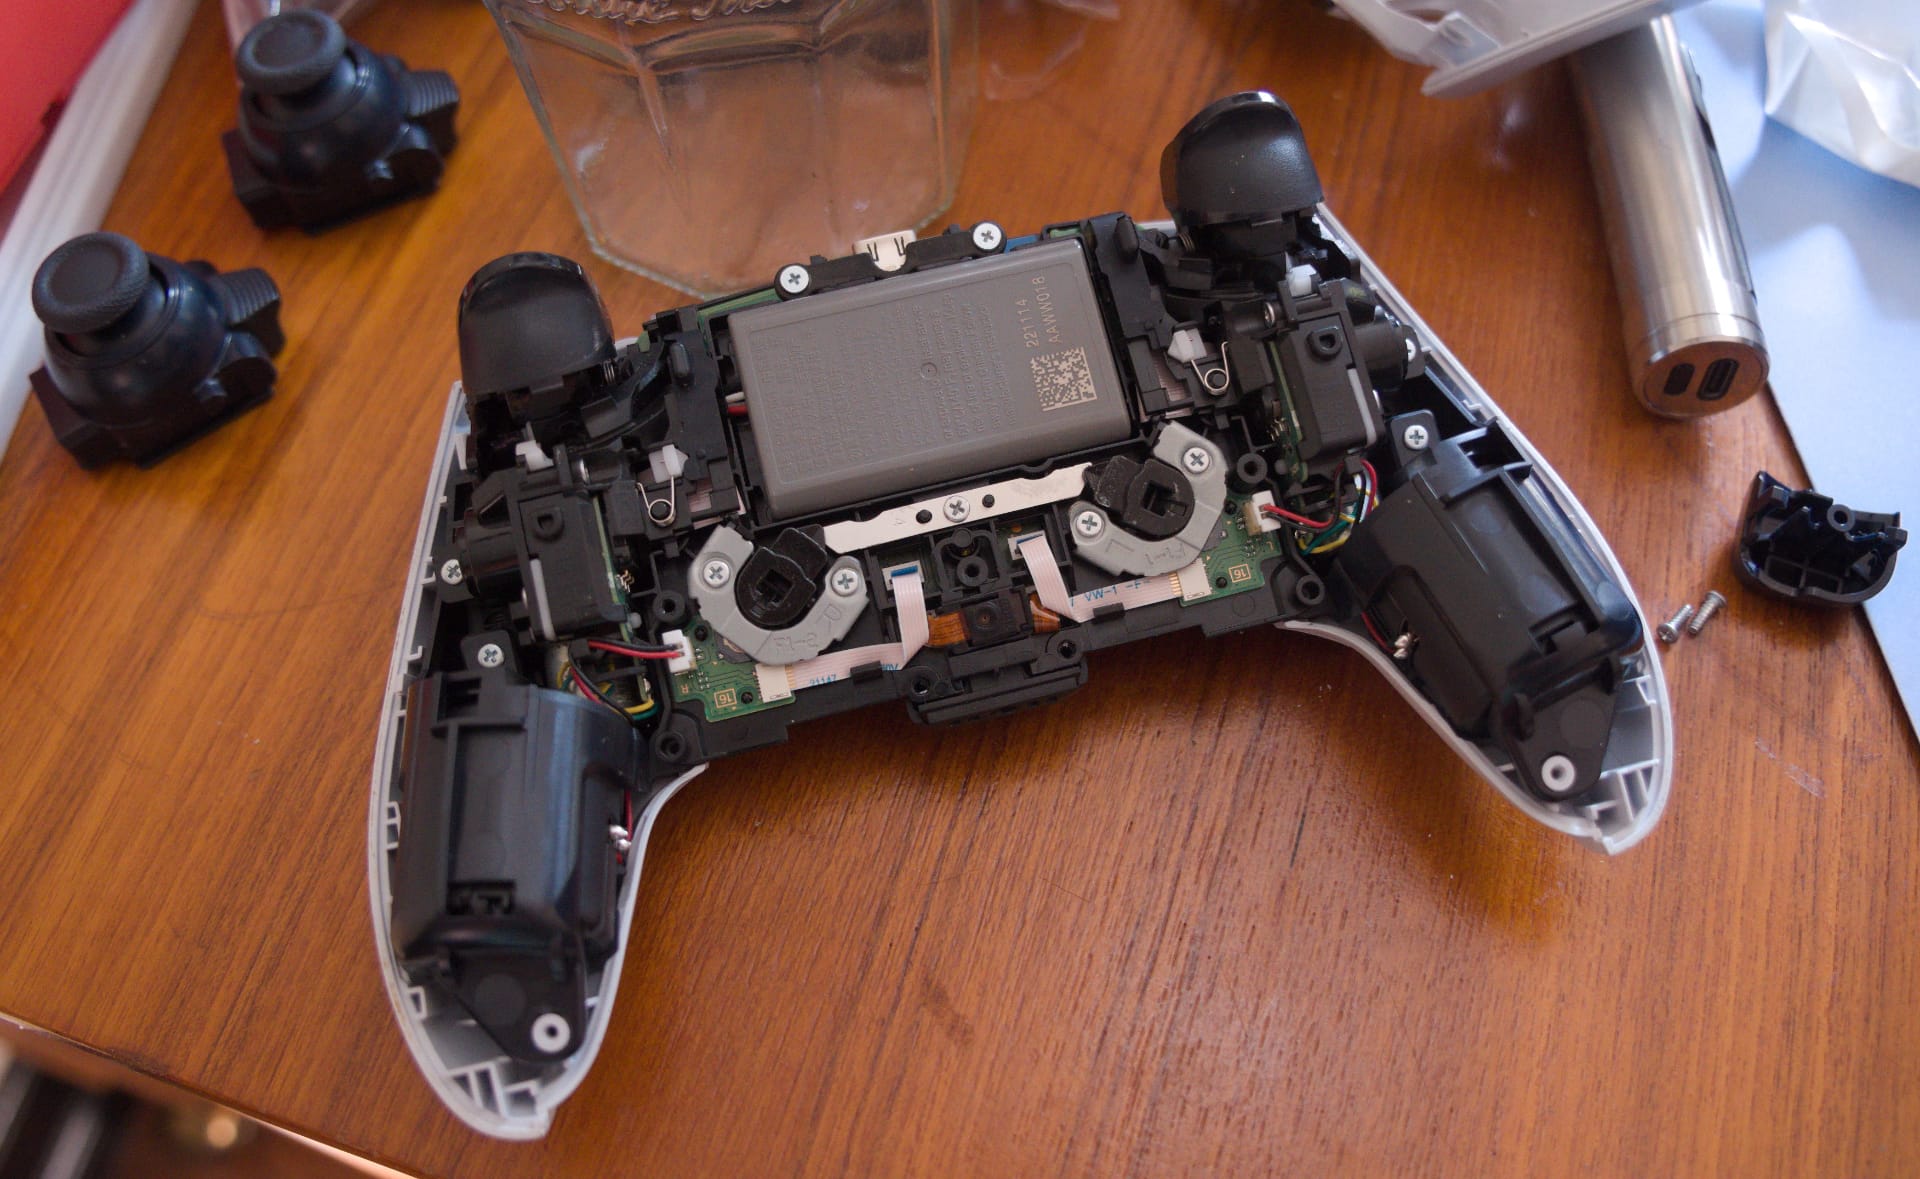
The inside of the DualSense Edge is complicated, but it’s laid out far more logically than the base DualSense. There’s a clear order inside of it, fewer opportunities to fuck up, and while Sony didn’t make a truly user-serviceable piece of hardware, they made one that is generally pleasant to work inside of. Ribbon cables can still be torn if you aren’t careful, but you’re less likely to do so because only one of them is in an annoying place. There are a few springs that can get lost easily if you aren’t careful, like the ones near the PlayStation logo button, the one that connects the latching mechanism latch, or the little tension levers that provide force against L2 and R2. The battery requires some effort to get to but connects and disconnects by simple pressure, although you have to be careful to pull the battery connector in the proper direction, namely up away from the controller.
If you follow the instructions, there are really only three parts of a DualSense Edge shell swap that suck and two of them are optional. The first is the touchpad, which is the last thing you remove from the controller and thus the first thing you place in the new shell. If you want to replace the touchpad with the included transparent one, you’re going to need a heat gun or hair dryer to loosen the adhesive, pull it off, then reapply the board to the new pad. If you like the back pad or know you’re too OCD to handle possibly seeing imperfections on the adhesive you can skip that.
The second and by far the worst is replacing the triggers with the included clear ones. This requires you to remove the individual trigger modules, disassemble them without losing the tension levers, remove the trigger, wrench out the internal base of one of the triggers with immense force, snap them into the new triggers, then reassemble the entire thing. I liked the old triggers and buttons anyway and thought they contrasted nicely with the smoked clear plastic, although I did try and can confirm that it’s not worth doing if you can avoid it.
The third annoying part, which is mandatory, involves carefully sandwiching slivers of PET film that cover two trigger depth levers. I dislike doing this, but it’s not the end of the world. Whatever you do, make sure you put a couple of thumb sticks in and test the controller halfway through assembly to make sure you didn't miss a ribbon cable and have to completely disassemble it again. I did when I tried a trigger swap, and having to go back in sucks.
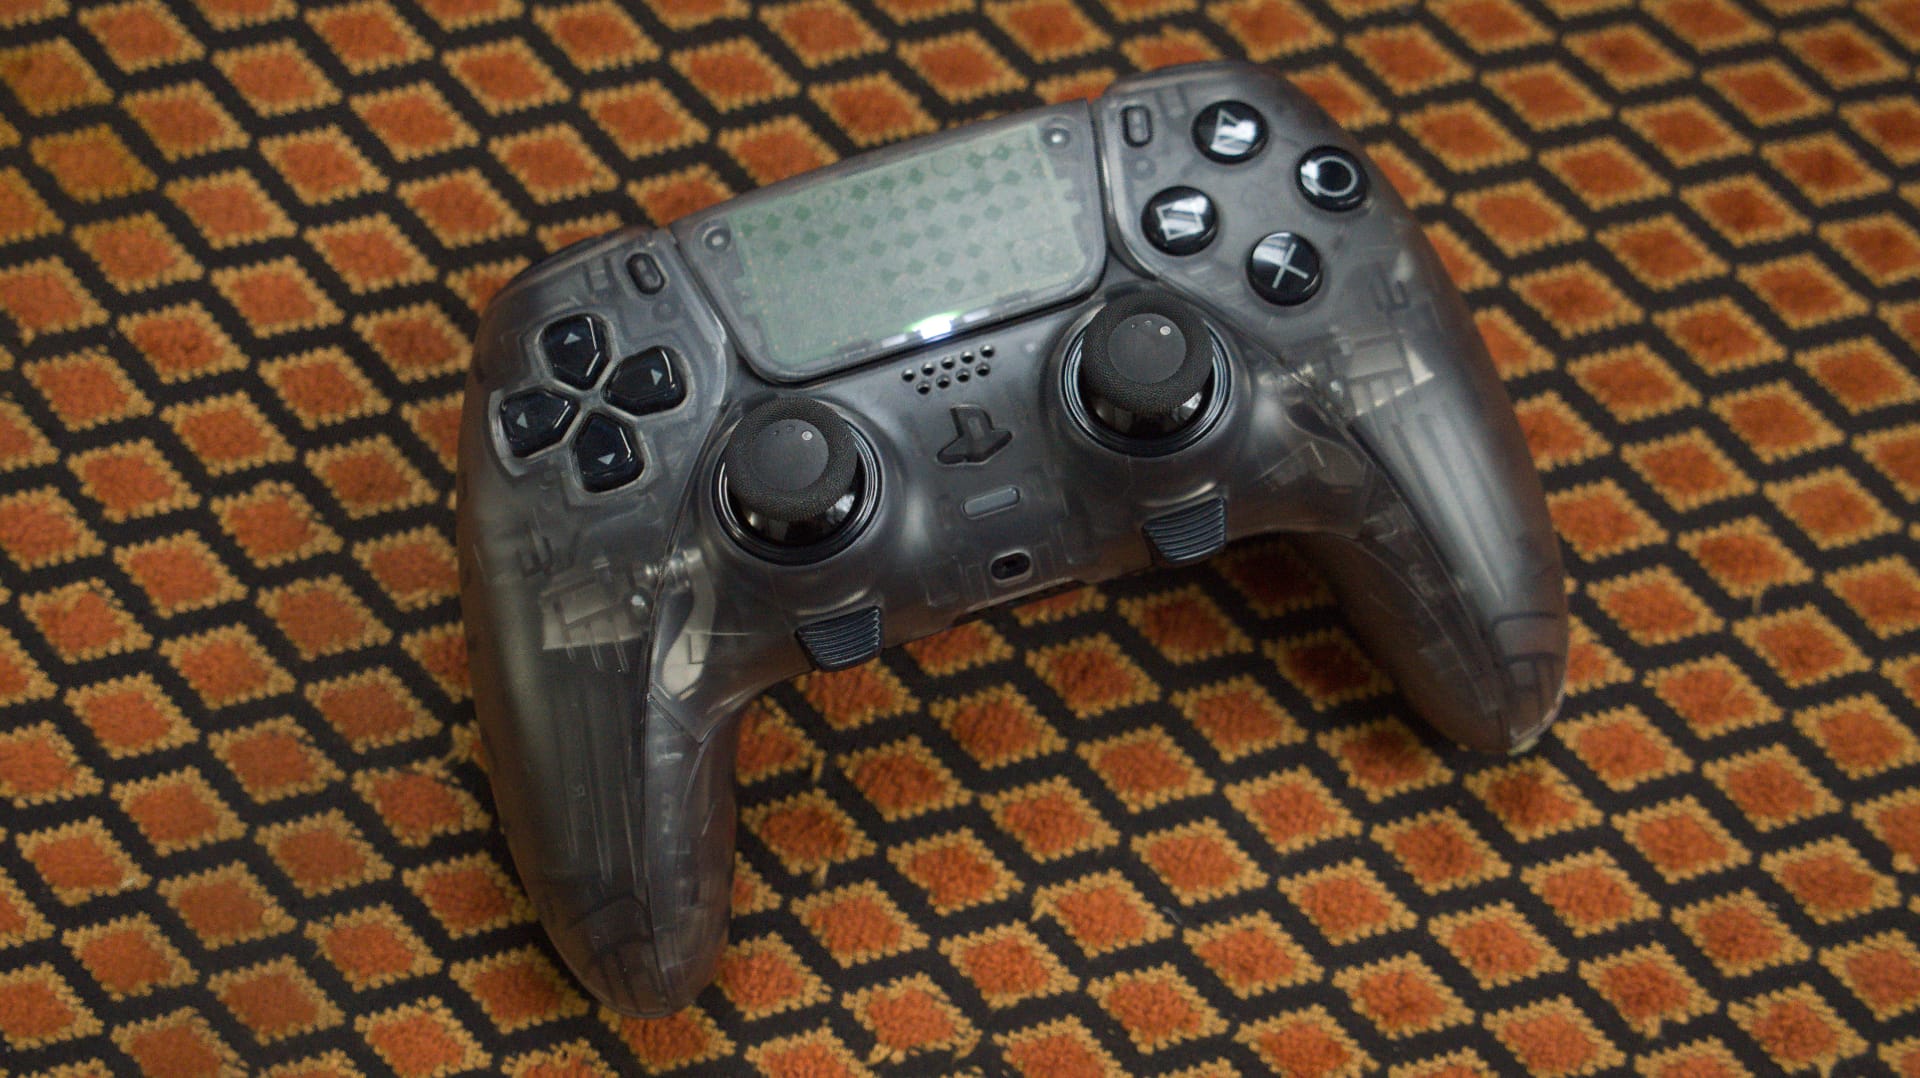
A few hours worth of work here and there and I had a smoked translucent controller of the exact same quality as when I started. The grips lack the rubber of the original Edge, but that and the strange but beautiful microtexture of the original controller can be dirt magnets so it’s not all bad. With that done, it was time to upgrade the modules.
TMR time
Despite me writing, publicly and on this site, that the DualSense Edge is far too expensive a controller for what you get, I do think it’s a good controller in terms of how it feels in the hand. Sony remains correct that symmetrical thumbsticks should be the default layout, and the DualSense Edge having replaceable stick modules should be standard even if I think the modules are far too expensive and need to be replaced with TMR modules instead. The adjustable trigger throws are good, and I quite like the dome buttons that Sony uses for its back paddles, another feature which should just be standardized at this point. I still dislike how proprietary much of the PlayStation ecosystem is for controllers, but I won’t deny that their product designers are talented.
 Chris Person
I think this is one of my first hardware hacking pieces on the site.
TMR modules are low-powered stick modules that are far less prone to drift. When stick drift became a huge issue years ago, the successor in DIY spaces was initially Hall Effect sticks, which use magnets, but TMR sticks have more or less eclipsed those in every new controller in the last few years. The Steam Controller comes with TMR modules stock, and that’s one reason I respect it so much and it’s become my default controller for most of my gaming. Countless Chinese controller companies have popped up, like Gullikit, GameSir and 8-Bit Do or ZD-0, and so the price of a feature-rich controller has gone down immensely. You can actually just buy those modules yourself and solder them in, and some of those controller companies just straight up sell those too.
A good general video of what modding this requires, although I’d probably use the method below for getting calibration.
The solution that Sony came up with for the DualSense Edge was user-replaceable modules. In the abstract this is a good idea, and more companies should aim for their products to be user-serviceable with the least amount of futzing possible, something Valve has been quite good at by partnering with iFixit and generally being transparent with its documentation. The Edge modules cost about 20 bucks each, but the issue is that you are replacing them with the exact same modules either way, so there’s a nonzero chance you may run into the same problem for a controller you’ve already dropped 200 bucks on plus the cost of those replacement modules. Product timelines are long, particularly at scale, and the controller came out in 2023, but there needs to be a better solution for whatever replaces the Edge when the PS6 drops.
If you spend 200 dollars on a controller you’re probably anal enough that you want it to function perfectly. But despite the modules themselves being easy to remove, replacing the existing sticks with TMR sticks is surprisingly tricky. The most direct way to go about this is to crack open Sony’s modules, desolder the existing sticks, and replace them with modules like the K-Silver JS13 Pro+. K-Silver modules are becoming standard in the DIY space, and a modified version of those modules appear in the Steam Controller. There’s actually dedicated solder tips just for removing the sticks of these controllers if you do enough to require that. But the complication is that there’s a crucial chip on the bottom of the module that’s very easy to damage with heat. If you go this route, heat-resistant Kapton tape on crucial components is your friend. The other issue is that calibration is typically done at the factory, and so if you want to calibrate the new modules you need to disable or desolder a handful of 0201 SMD components.
Metal Plastic Electronics is a fantastic channel for stuff like this.
This entire procedure sucks so much that there is a market for people who will modify Sony’s stick modules for you. However, in the last six months, aftermarket clone TMR modules for the Edge appeared online. In the interest of journalism I decided to try some out and went with a company called Besavior. The modules themselves contain K-Silvers. The most expensive Besavior module specifically does adjustable by rotating the sticks, and I believe they are using the JT13s from K-Silver. Adjustable tension is conceptually neat and appears in competing modules like the NS-55 stick from Gulikit, but if you don’t need that feature it isn’t worth the extra money. What’s more, the tension twist removes the ability to quickly swap endcaps, and the modules themselves have a slightly longer throw than stock. As a part of this build, I also have some high grade polyurethane stick caps coming from a guy on Etsy called LiveZone, so I’m probably going to return these TMR modules in favor of the lower cost model.
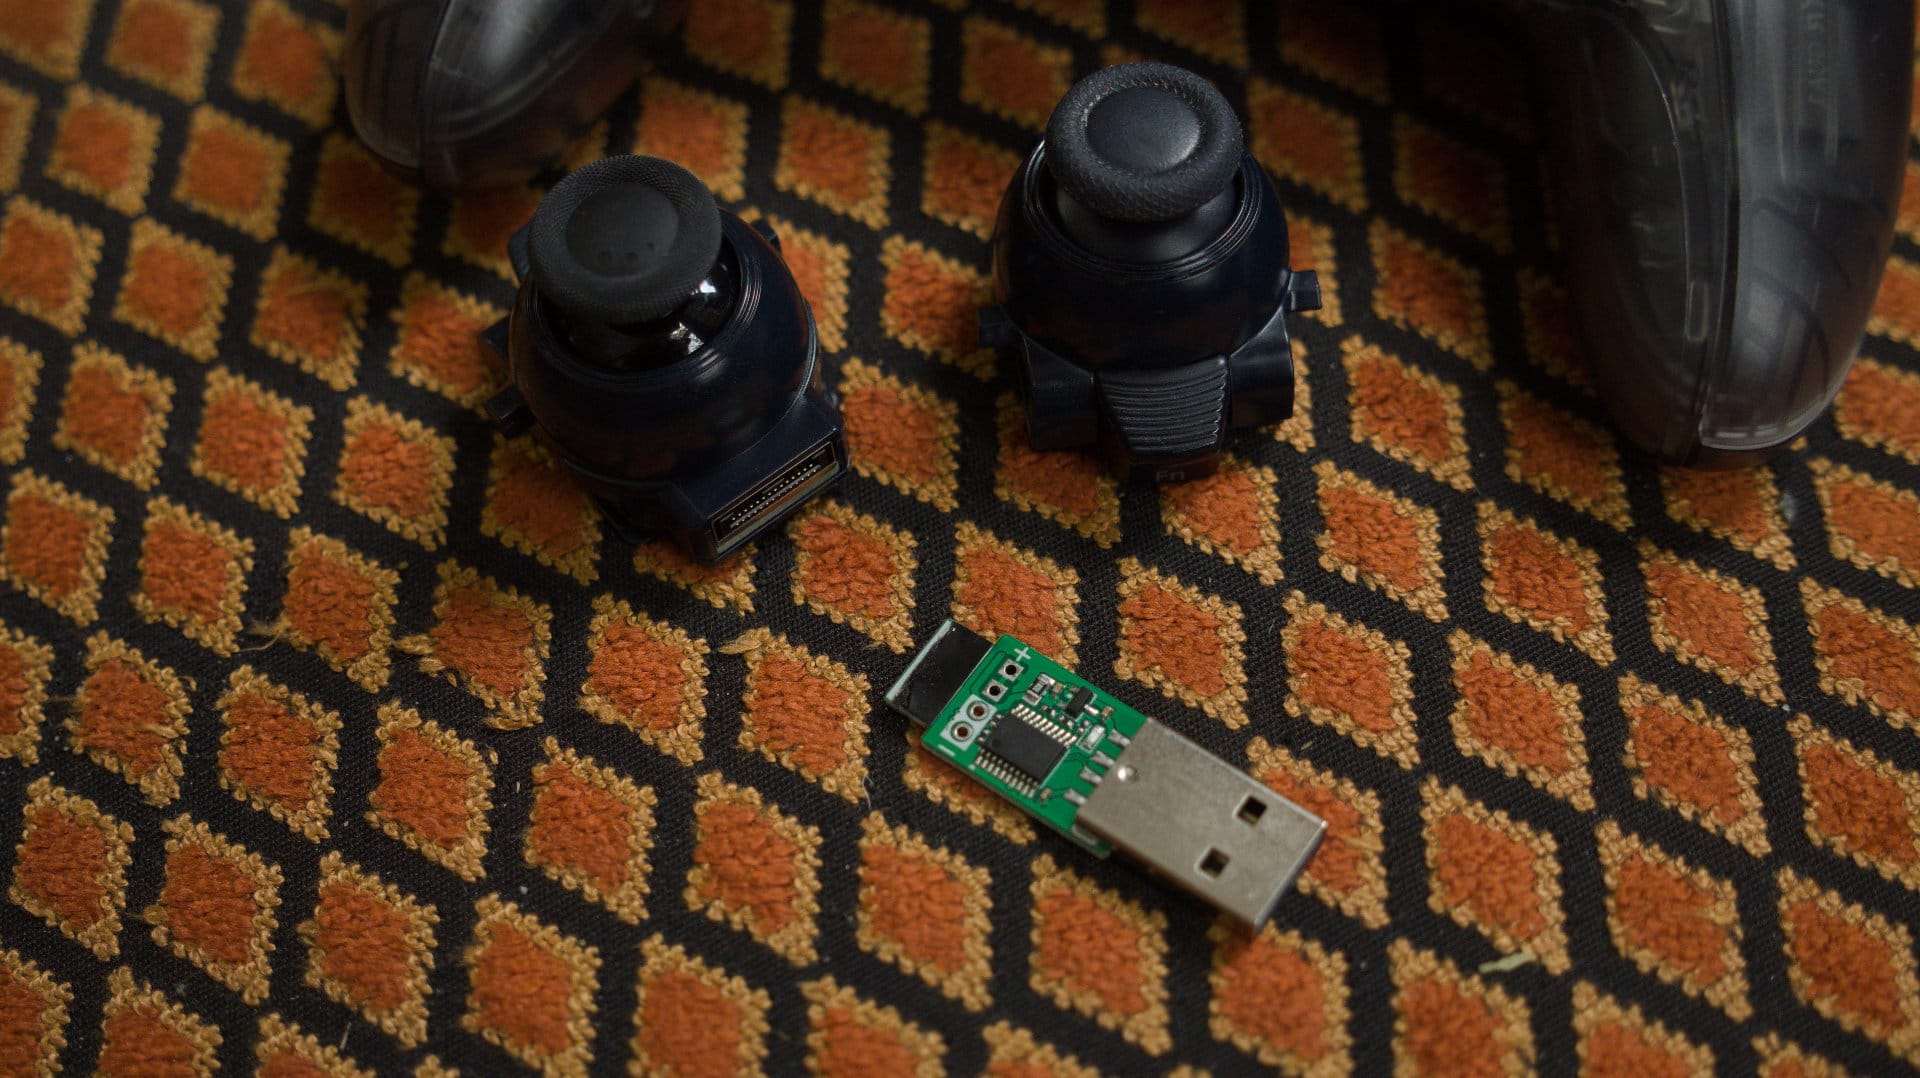
The Besaviors feel quite nice, have decent circularity, and the endcaps feel solid, although their base is shiny instead of matte. Besavior also includes a USB dongle for updating the firmware on the sticks themselves, which I believe is there in the event that Sony pushes an update that bricks them. Having to include a PCB dongle for your aftermarket controller thumbsticks as a contingency because Sony itself does not sell a sufficiently durable stick module is the height of absurdity, and one that could simply be solved by Sony selling Edge modules that don’t suck.
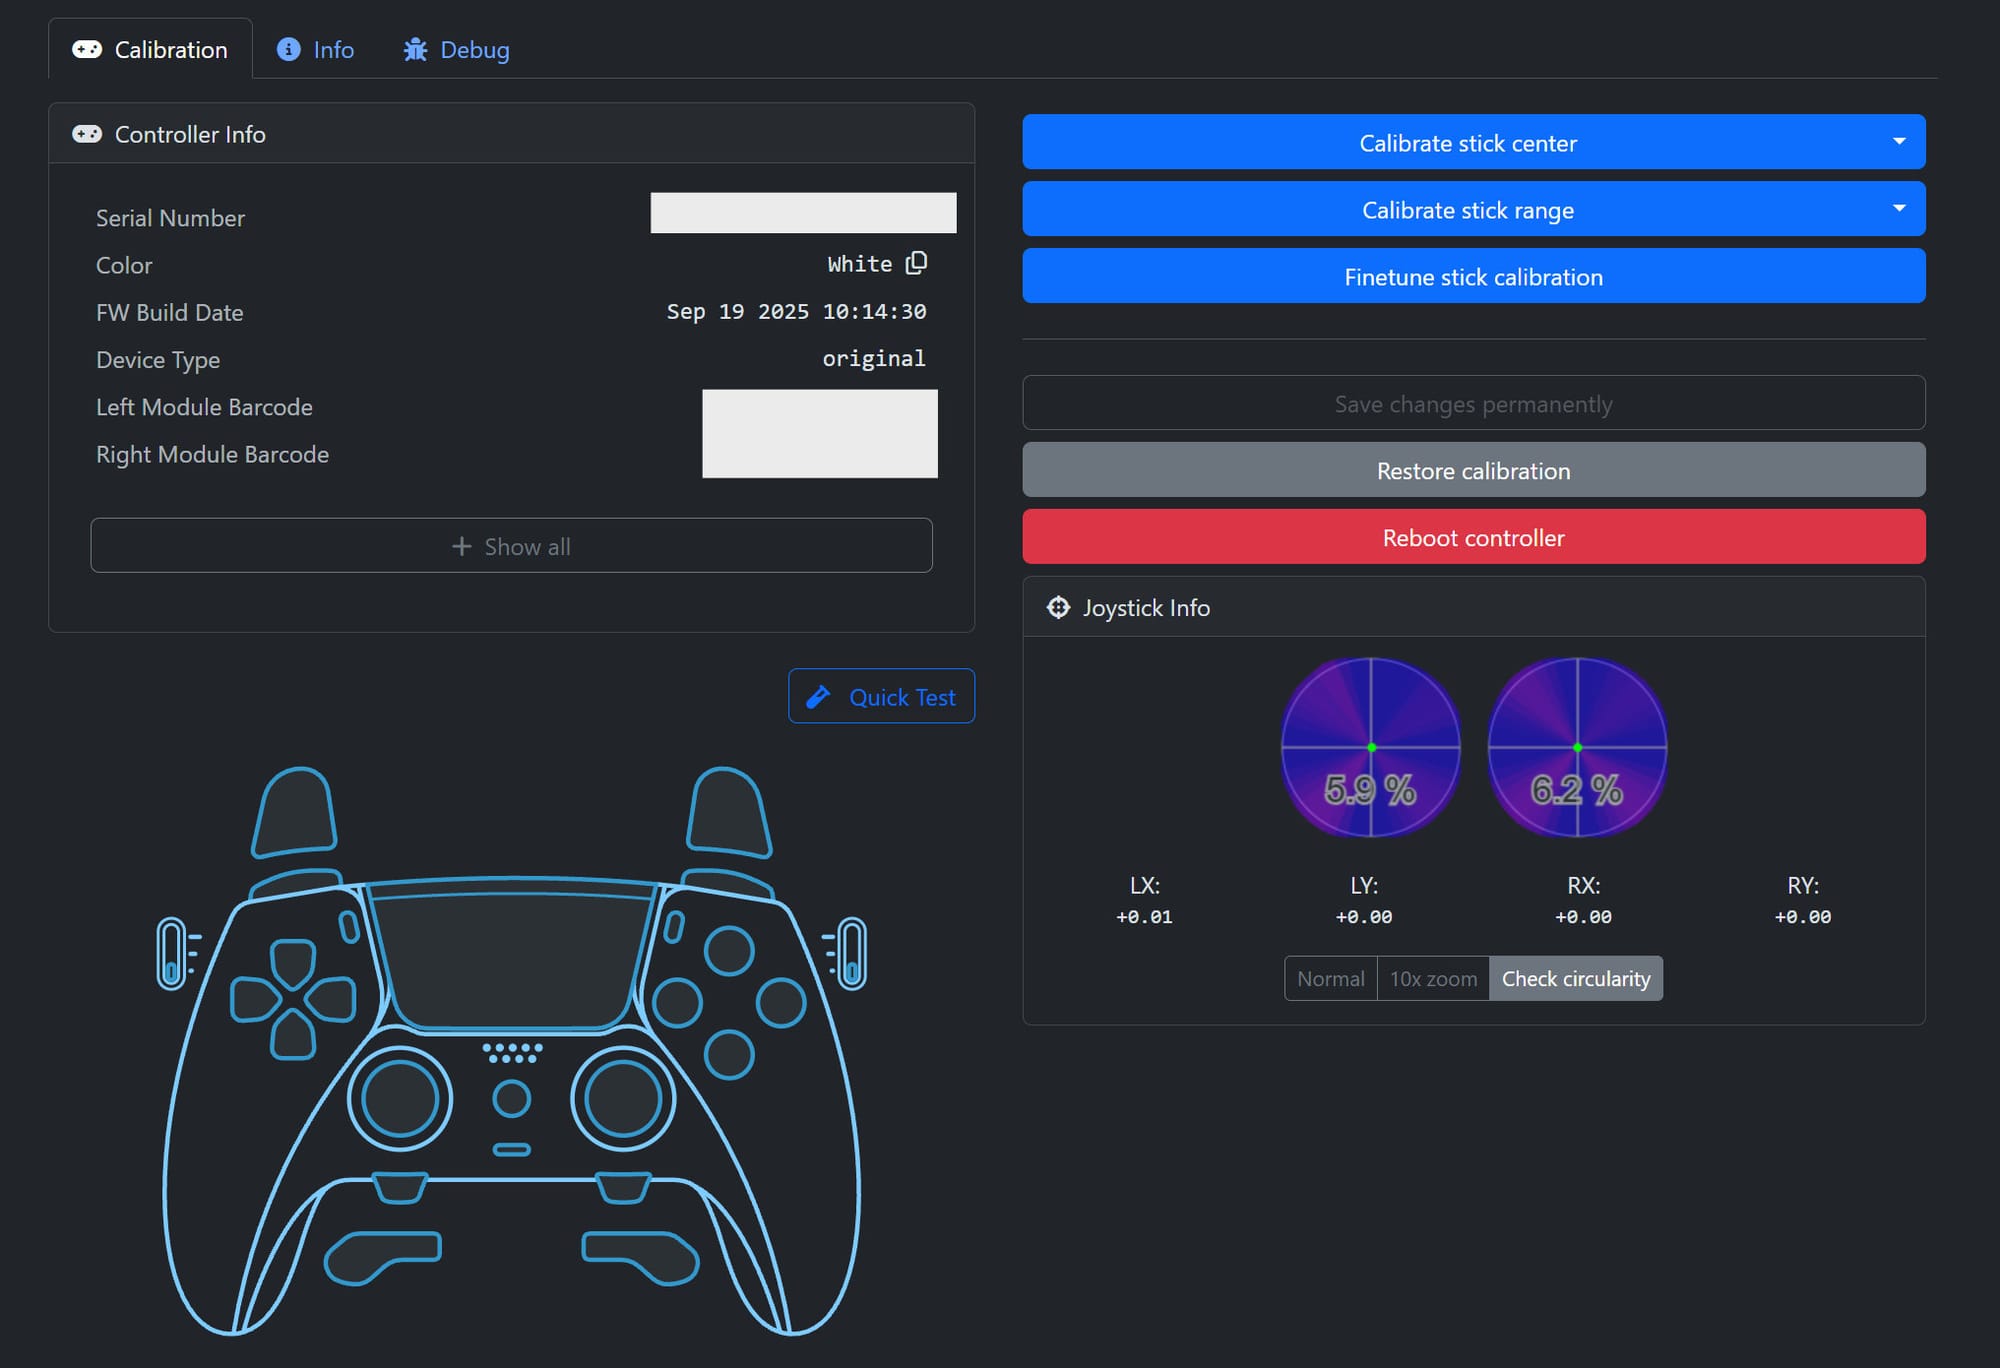
No matter which way you go, either the onerous soldering job, outsourcing it to a random guy, or buying an aftermarket clone module, you will need calibration. Dualshock Tools on Github is used to fine-tune calibration on either modded or aftermarket modules. In terms of testing gamepads, the open source software suite at Gamepadla remains the most reliable. The reassembled Edge with its new sticks and shell worked perfectly.
I didn’t really have to tear this Edge controller apart. I did it because I like a project, I enjoy writing about strange corners of the hardware universe, I need a good PlayStation controller for when GTA comes out, and I took a gamble on a deal and won. All told I still spent a decent chunk of money to get it into shape, although it was far less than the cost of an Edge controller retail.
Despite my criticisms, the Edge is still a beautiful if extravagant controller and laid out better than the normal DualSense. If you have to stay in Sony’s closed garden, it can be transformed into an endgame controller with a bunch of work. But technology has lapped it; it is far too expensive for its feature set, and it exists frozen in a strange in-between area by leaner companies. By virtue of mainly gaming on the PC, I find that I use my Steam Controller far more. It’s half the price of the Edge, also has symmetrical sticks, the battery lasts for ages, and I didn’t have to torture it to get driftless TMR sticks. I wonder what will happen when Sony finally decides to update the Edge. I just hope that I won’t have to hunt through ewaste listings for it and turn it inside out for it to make sense in my life.


