

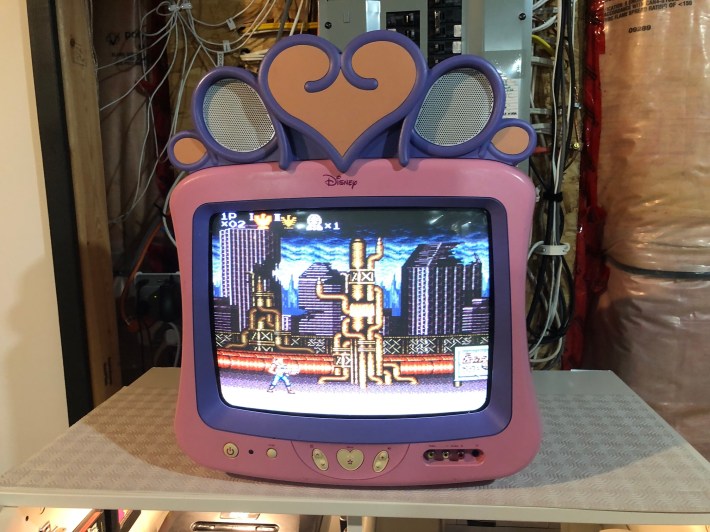
Back in December of last year, I was dropping off my laundry and a 24 inch JVC I’Art was sitting on the curb, looking at me like a lost puppy. It’s a gorgeous TV. I couldn’t leave it to the elements, so I brought it home. Thus began a multi-month project to fix it and in the process learn TV repair like the Sally Struthers commercials always suggested.
CRT TVs are incredible devices. Unlike today’s wussy-ass electronics, you would be shocked at the kind of abuse a CRT can survive after being exposed to the elements and still manage to function. I’ve read numerous cases on enthusiast Facebook groups where someone has found a TV that’s been sitting outside and plugged it in and it’s fine. As long as the tube doesn’t have an obscene amount of burn or the glass is pristine, you often have something to work with. The glass in this case was flawless, and the TV in question is one of my favorites.
Among CRT nerds, there are very arbitrary tier lists. I could dedicate an entire article to this, but generally speaking at the top you have professional and presentation monitors, followed by later era standard definition consumer TVs. 480p, HDTV and Computer CRTs are their own thing for complicated reasons, and flat screens, while nice looking, are generally considered to have worse screen geometry than rounded ones. People tend to gravitate towards Sony Trinitrons, but among heads the JVC D-Series is considered one of the best consumer models because it plays retro games well, has a nice image, component input (YPbPr, or the red, green and blue ports), and a rounded screen. The TV I found was the model they made after the D-Series, the JVC I’Art, which is functionally very similar although with a flat screen, making it slightly less desirable but still an incredible TV. 24 inch TVs are the top end of desirable sizes, as anything larger than that becomes increasingly difficult to move without more than one person. This TV deserved a home. It deserved love.
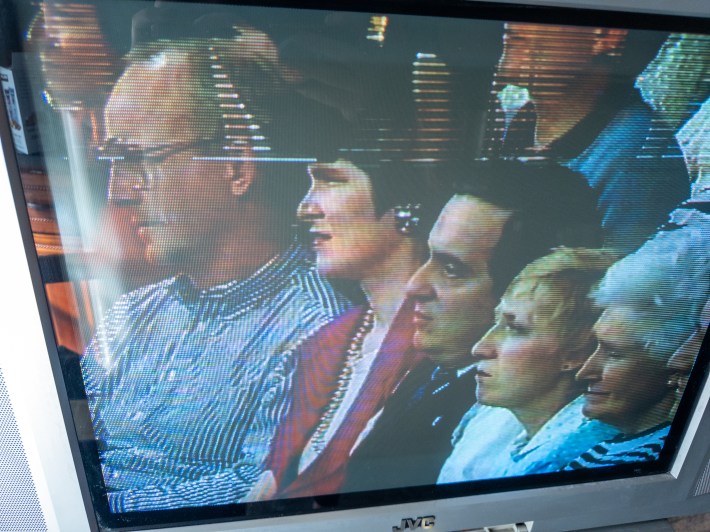
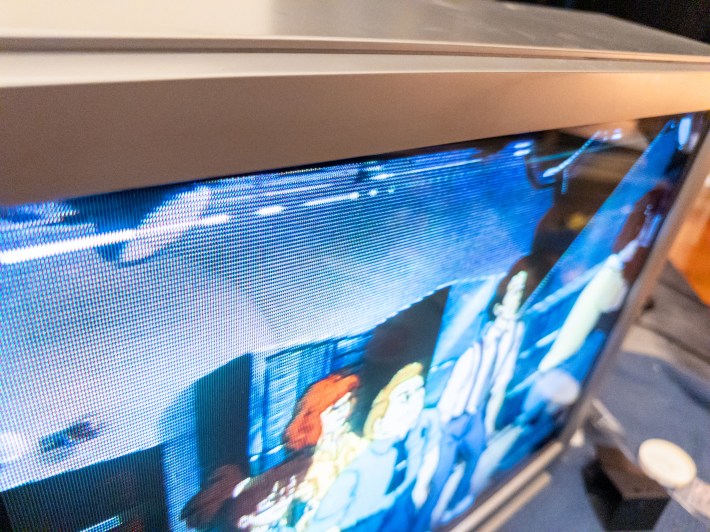
So I got it home. I plugged it in. It turned on! It works! Well, almost. As I poked around more and more, I noticed something on the top of the image. It wasn’t burn in, which I know well, but a weird other thing. I decided to go to the repository of most human knowledge about this topic: a CRT Discord I’m in and a dedicated Facebook group. I’m promptly told that what I’m experiencing is an issue called vertical foldover. A number of causes for this are plausible, but what probably happened was one or more capacitors on the board failed. A very helpful user was also able to find the service manual for this specific board, and located the caps that probably caused the issue. I was getting somewhere. I just need to crack this thing open and take a peek, which is the hard part.
The issue with repairing a CRT is that it can be tremendously dangerous even when unplugged if you don’t know what the hell you are doing. CRTs can hold a charge that needs to be carefully discharged via the anode cap, and while that’s not a complex process, it’s probably something you should learn from a trained professional or someone who has done this a lot in real life, not the internet. This is my way of very clearly saying that I do not recommend or endorse you doing this cool thing I found personally enriching.
In my anecdotal experience, the people who still like mucking around the inside of CRTs are either ancient TV repair people, guys from some place like Connecticut, or queer nerds who like circuit bending and messing around with vintage computer stuff for fun. I was lucky that an acquaintance from Twitter named Emily (you can follow her on Twitter/Bluesky) had done enough modding to be able to show me the ropes, which was very nice. She met up with me, came over to my place, and like Bjork before us, we opened up the TV to peek inside.
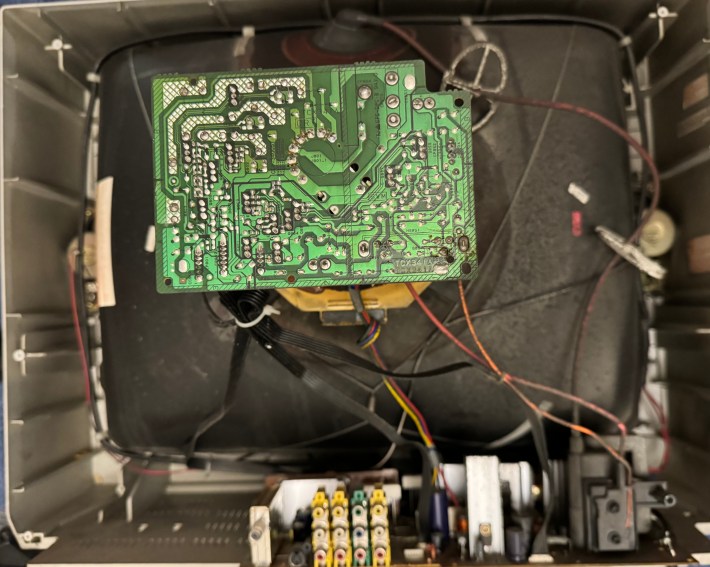
Whenever you take apart old electronics, it can go sideways quickly. It’s worth taking copious notes: you have to remember where your screws go and store them appropriately. You take a lot of photos, and make sure that every cable that is potentially unplugged gets plugged in again in the exact same way. In the case of a TV, it helps to have a very long screwdriver to open it up, which is tangentially related to the most dangerous part of TV repair: discharging the tube. CRTs have a little suction cup that attaches to the top of the tube. This is ideally done with something called a high voltage probe, which is a tool specifically for the purpose of discharging tubes and is the correct way to do this. A lot of people get by with an insulated screwdriver with a wire either duct taped or banana clipped to a ground point, but my understanding is there are theoretical problems with this, and it’s not going to be as safe as an insulated tool made specifically for the purpose.
Regardless of the tool used, the basic principle is the same: you connect it to a ground point, and then, with one hand behind your back, worm the tool under the weird little anode cup. You may actually hear the tube discharge. You may not. We covered our bases until we were more or less certain the tube had been completely discharged, then removed the cap and got to work. The first time you do this, it’s a terrifying experience, but every subsequent time it’s distinctly less so.
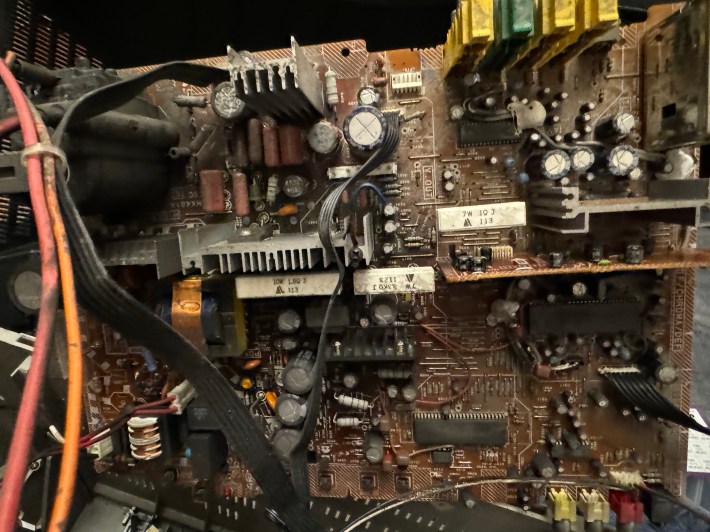
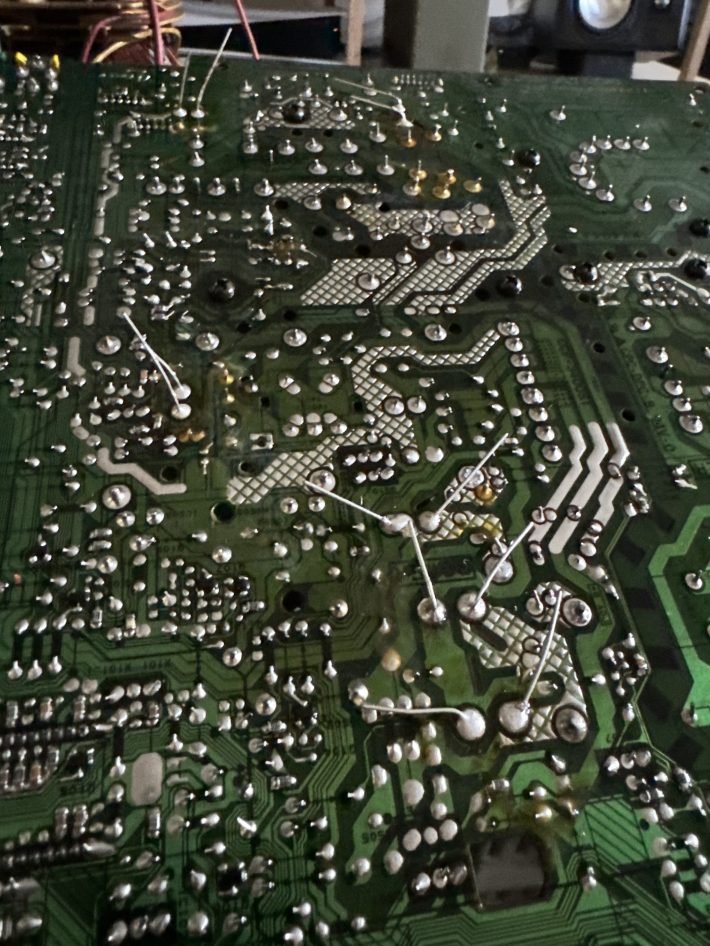
The nice thing about vintage analog electronics repair is how often the answer is just swapping out some old capacitors (the big tubes on circuit boards). Japanese capacitors from companies like Rubycon, Nichicon and Panasonic are almost always a safe bet. We took extensive notes of which capacitors looked iffy, focusing in particular the area around the heatsink near the vertical IC, which is responsible for the foldover. I would have used a multimeter if I was thinking straight, but maybe next time. Electrolytic capacitors all have different values which are pretty easy to diagnose because they usually say them on the side in big letters, so if you don’t have a manual you at least have something to go on.
We put the TV back together. With the notes and some advice from someone on Discord, and using the service manual as a guide, I ordered the capacitors I needed from Digikey and waited.
Aside from repairing an old screen, there’s another reason why someone would want to get inside a CRT, which is to modify it to accept RGB color. That is shockingly rare in American consumer CRT televisions, which were mostly equipped with either coaxial or RCA inputs (the yellow, white and red cables) which just shove the image into a single signal. Back in the day, if you were lucky, you would get S-Video, which separated the Luma and Chroma or (basically light and color). At the very end of American CRT TVs we got Component, which is pretty good but which was not (despite having red, green and blue colored ports) RGB but YPbPr, which is this other super confusing thing where the green cable carried the light values and the two others carried the colors. Europeans solved this by just inventing SCART, which had RGB in it, and was vastly superior and correct.
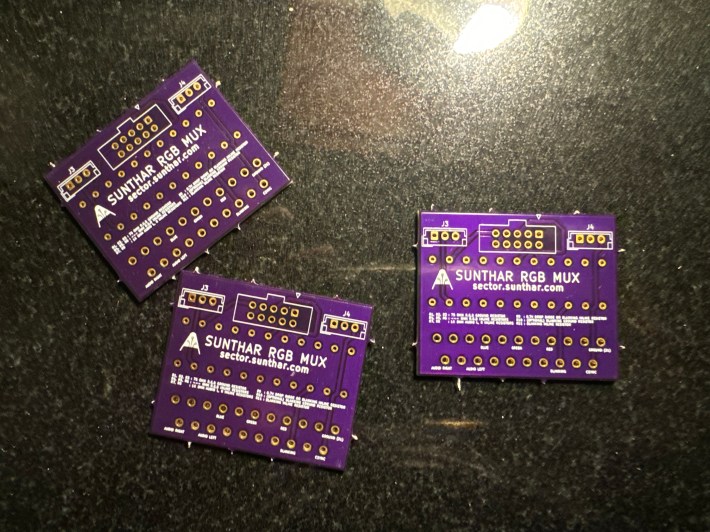
The process of hacking RGB into televisions is very complex and much of the information for it comes from a 171 page thread on the SHMUPS forum. Most of the time it involves using a dremel or saw to put a new input in the back of your TV. I did get a bunch of custom PCBs made for it thanks to Sunthar, and I hope to write a post about it someday, but the JVC I’Art has component inputs, so it’s really not worth the trouble to do that this time.
I waited for the capacitors to arrive. During the process, this I’Art just stayed in my office, it’s still in there as I am writing this. I am lucky enough to have an office in New York that is large enough to accommodate a 24 inch CRT on the ground with minimal disruption of my life, but having a street TV on the ground is one of those situations where once that becomes acceptable your mind just accepts that there are no rules any more. You can organize tiny DIY projects, but when you let something that big in, chaos reigns.
The capacitors arrived. When I was finally able to clear an afternoon, I got to disassembling the thing like I had before with Emily. It was easier this time, there was less mystery and terror, and I had a clear blueprint thanks to the help and mentorship of several people. Now the hard part began, which is desoldering.
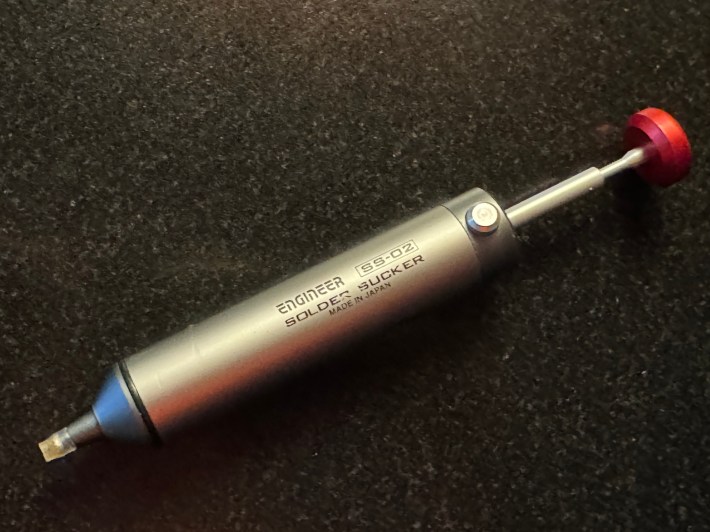
Desoldering sucks. The process of soldering something to a board is a joy, but correctly removing the solder and part can be thoroughly annoying. If you really mess it up you risk screwing up the board permanently. There’s a lot of ways to do it. In every single instance you’re going to want flux, which you should have regardless for soldering. If you’re fancy you can use a desoldeing pump, which is like a soldering iron combined with a sucker. Solder wick is also useful: it’s a disposable copper braid that you put over a solder point and which sucks up the excess solder when heated. If you wanna cheat, you can use wick in conjunction with Chip Quik, which is a solder with a lower melting point that you add to existing solder.
The simplest tool is a solder sucker, and most of the ones I’ve used are cheap and awful to use, except one: the Japanese-made Engineer SS-02. It’s made of aluminum and lets you replace the nozzle with heat resilient tubing when it gets dirty. I cannot stress how life changing it is, and it helped me make quick work of the caps safely. If you learn nothing else from me, learn to love this solder sucker.
Once the first round of caps were replaced, I reassembled the JVC, plugged it in, and braced myself. I powered it on, and it worked! And it looked better! Well, mostly. The issue was half fixed. The vertical foldover had lessened significantly, giving credence to the theory that one or more capacitors had failed. I had not done a full flight of capacitors, which would have taken ages; just a handful of the most likely ones to get started. But what’s important was that I had done something far more meaningful: I had taken apart a CRT TV, replaced parts in it and it worked. I had taken an object that was previously dangerous and forbidden in my mind and made it familiar. The feeling of teaching yourself a skill like that is one of the purest joys I know.
I went back to the drawing board and ordered more caps, and about a month later finally got around to fixing it. The foldover is gone now, but the picture was vibrant where it had previously been a little dull. This thing was more alive than it had been in years.
And then, after all that, I noticed it: a slight amount of burn in on the top and bottom of the screen. The person who owned this had probably watched a lot of 16:9 content. The TV works fine, but there's not a lot you can do for something like that aside from completely replace the tube. Ah well.
Was it worth it? I don’t need this TV. I don’t plan on keeping it. I lost time, money, and physical space to the process of repairing it. And yet the answer is overwhelmingly yes, in part because my other CRT might die some day, but also because it gave me a skill, mastery of a now-dead technology, and the start of a potentially lucrative career in TV/VCR repair, just like the commercial promised.
Anyway, does anybody want a free TV with a little bit of burn-in? You have to pick it up in New York City. I'm dead serious.


